
- 02 Nov 2026
Why Do LED Inground Lights Fail After Heavy Rain?
Why Do LED Inground Lights Fail After Heavy Rain? Causes, Symptoms and Diagnosis
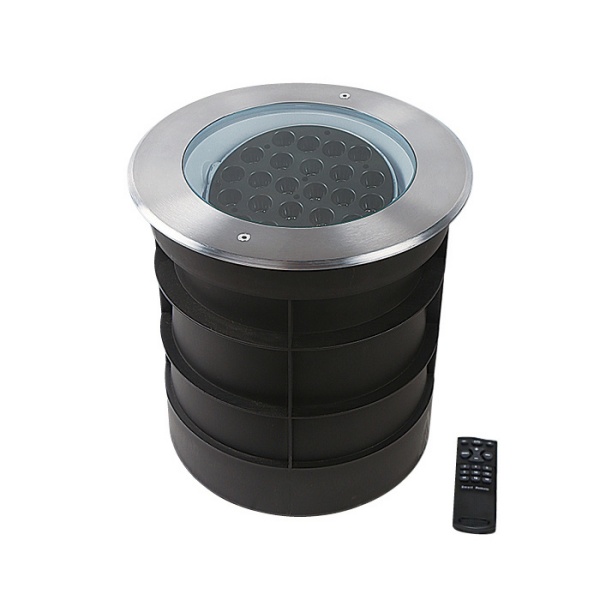
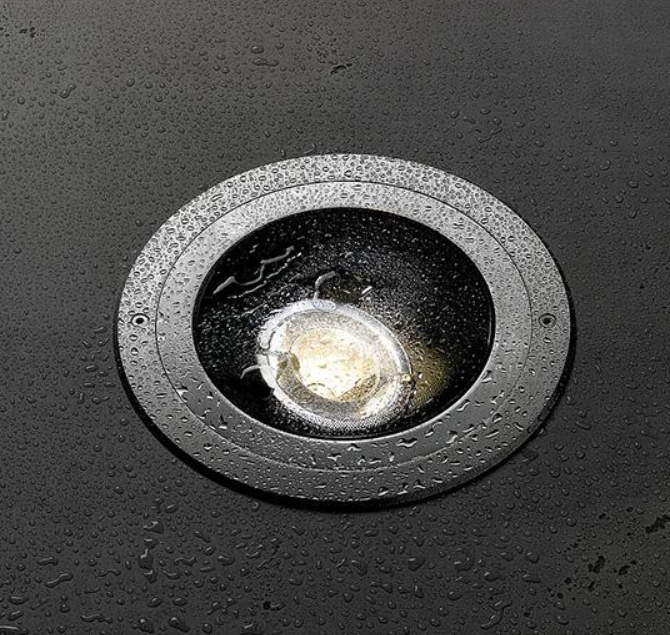
LED inground lightsLED Inground Lights are widely used in gardens, pathways, hotel entrances, landscape areas and architectural projects. However, after heavy rain, some outdoor ground lights may develop problems such as water inside the fixture, foggy glass, intermittent operation or complete failure.
Why does this happen?
In many cases, the problem is related to the interaction between moisture, sealing components, cable connections, drainage conditions and changes in temperature. Identifying the actual source of moisture is essential before deciding whether a fixture needs repair or replacement.
This guide explains the common causes of LED inground light failure after heavy rain, how to identify different moisture-related symptoms, and what project buyers should check when selecting ground lights for outdoor applications.
1. Why Do LED Inground Lights Fail After Heavy Rain?
The most common reason is moisture entering or accumulating inside the lighting system. However, not every foggy lens means that water has entered the electrical compartment.
The main causes include:
Deteriorated or improperly compressed sealing components.
Moisture entering through cable connections or junction boxes.
Water accumulating around the fixture because of poor drainage.
Temperature changes causing condensation inside the fixture.
Damaged lens-to-housing interfaces or cable entry points.
Long-term exposure to moisture that affects electrical connections.
It is important to distinguish between actual water ingress, surface condensation and internal condensation. Each problem has a different cause and requires a different solution.
2. Five Common Causes of Water-Related LED Inground Light Failure
2.1 Aging or Damaged Sealing Components
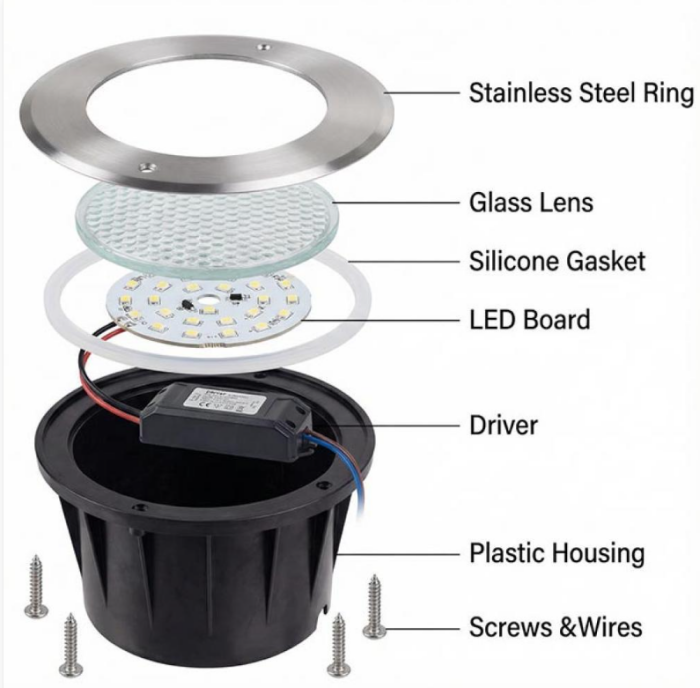
The sealing structure is one of the first areas to investigate when water is found inside an inground light.
Common sealing components include:
Silicone or rubber gaskets.
Sealing rings around the glass lens.
Cable entry seals.
Sealing interfaces between the housing and cover.
Over time, repeated temperature changes, mechanical stress, material aging and improper assembly can affect the sealing performance.
For example, if a gasket becomes hardened, cracked or permanently deformed, it may no longer maintain consistent contact between two surfaces.
Possible symptoms:
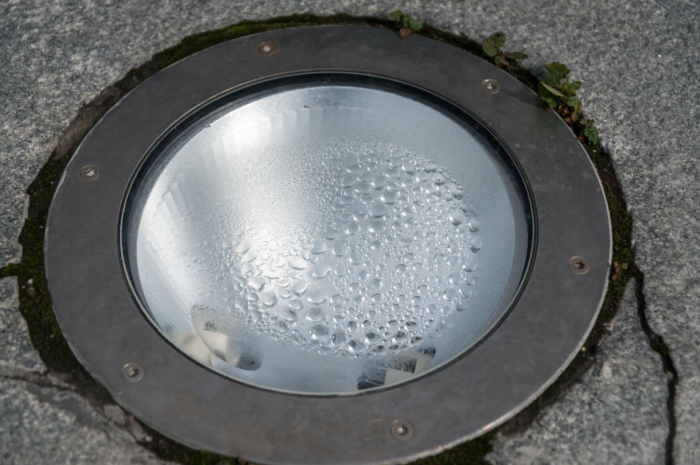
Water droplets appear inside the glass.
Moisture collects around the lens or housing interface.
The fixture works intermittently after rainfall.
Internal corrosion becomes visible during inspection.
What should be checked?
Inspect the gasket condition, sealing surfaces, compression uniformity and assembly condition. A seal that looks intact from the outside may still have an uneven contact area.
2.2 Moisture Entering Through Cable Connections
Water-related failures do not always originate from the lamp body. The cable connection system can also be a source of moisture.
Potential problem areas include:
Cable glands and cable entry points.
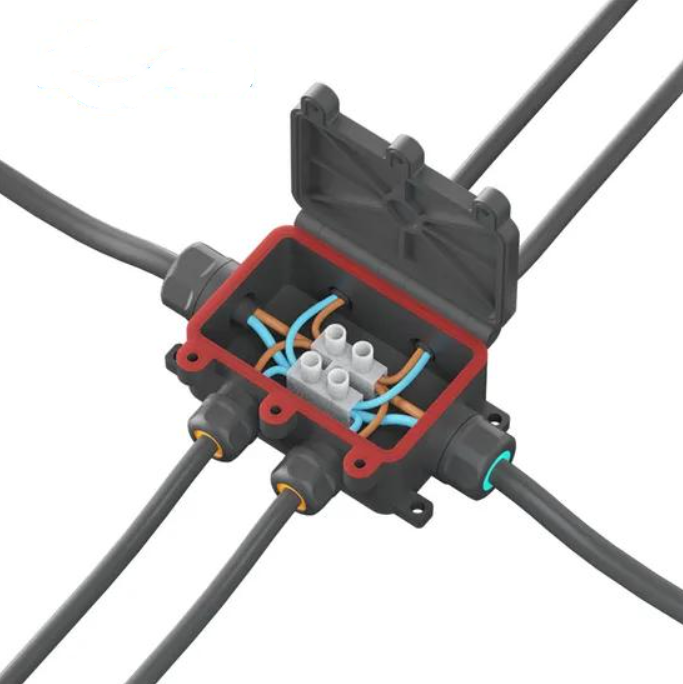
Junction boxes.
Cable splices and connectors.
Damaged cable jackets.
Poorly sealed connection interfaces.
Water may enter through a damaged connection or travel along a cable route and reach an electrical connection point.
This is particularly important in landscape projects where cables and connections are installed underground or in areas exposed to standing water.
Possible symptoms:
The light stops working after heavy rain.
Several fixtures connected to the same circuit fail.
Electrical connections show corrosion or moisture damage.
The fixture operates again after the area dries, then fails during the next rainfall.
What should be checked?
Inspect the entire electrical connection path, not only the light fixture. Check cable jackets, connectors, junction boxes and the condition of connection seals.
A fixture can have an intact housing while its external electrical connections remain vulnerable to moisture.
2.3 Poor Drainage and Long-Term Water Accumulation
An inground light is installed close to the ground, so the surrounding environment directly affects its operating conditions.
If rainwater cannot drain away, the fixture and its electrical connections may remain exposed to moisture for extended periods.
Typical high-risk conditions include:
Low-lying garden areas.
Soil with poor water permeability.
Locations near irrigation systems.
Areas where paving directs rainwater toward the fixture.
Installation locations where water collects around the housing.
The important issue is not simply how much rain falls. It is how long water remains around the fixture and its connection points.
Possible symptoms:
Repeated failures after rainfall.
Moisture remains around the fixture long after the rain stops.
Multiple fixtures in the same low-lying area develop similar problems.
Corrosion appears around underground connections.
What should be checked?
Observe the site after rainfall. Check whether water collects around the fixture, whether the surrounding soil drains properly and whether underground connection points are located in areas that remain wet.
For project applications, drainage conditions should be considered together with the lighting layout.
2.4 Temperature Changes and Internal Condensation
Foggy glass does not always mean that the fixture has a water leak.
Condensation can occur when moisture inside the fixture meets a surface whose temperature is below the dew point.
For example, after a warm, humid day, heavy rain may rapidly cool the glass and metal housing. If humid air is present inside the fixture, moisture may condense on the cooler internal surface.
This can create a temporary foggy appearance.
How can you distinguish condensation from water ingress?
| Observation | Possible explanation |
|---|---|
| Light fog disappears after temperature changes | Temporary condensation may be involved |
| Fog repeatedly returns under similar weather conditions | Moisture management or sealing should be investigated |
| Visible water droplets collect inside the lens | Possible water ingress or significant internal moisture |
| Water pools at the bottom of the housing | More serious moisture entry or accumulation |
| Corrosion or electrical malfunction appears | Requires electrical and moisture inspection |
Condensation should not automatically be treated as proof of a failed seal. However, persistent fogging, visible droplets or accumulated water should not be ignored.
2.5 Damage to the Lens or Housing Interface
The lens and housing form an important part of the fixture enclosure.
Small cracks, impact damage, surface deformation or defects around the sealing interface can create potential moisture entry paths.
This can happen during transportation, handling, installation or long-term outdoor use.
Possible symptoms:
Moisture appears near a specific edge of the glass.
A visible crack or damaged sealing surface is found.
Water accumulation occurs repeatedly in the same part of the fixture.
The problem affects only individual units rather than an entire lighting circuit.
During inspection, check the glass lens, housing, fastening points and contact surfaces for visible damage.Outdoor LED Inground Light
3. How to Diagnose LED Inground Light Problems After Heavy Rain
Before replacing a failed fixture, identify where the moisture problem is most likely to originate.LED inground light load ratings and protection
The following diagnostic process can help project contractors, maintenance teams and lighting buyers narrow down the cause.
| Observed problem | Possible cause | What to inspect |
|---|---|---|
| Foggy glass without visible water | Internal condensation | Temperature changes and internal moisture |
| Water droplets inside the lens | Possible water ingress | Lens seal and housing interface |
| Water accumulated inside the fixture | Significant moisture entry | Seals, housing and cable entry |
| Light stops working after rain | Electrical connection problem or moisture damage | Cable, connector, driver and junction box |
| Several lights fail in one area | Shared drainage or circuit issue | Underground connections and site drainage |
| Repeated failure at the same location | Local environmental problem | Standing water, soil and cable routing |
 A Practical Inspection Checklist
For a more systematic diagnosis, follow these steps:
Step 1: Record the failure pattern
Identify when the problem occurs. Does it happen immediately after heavy rain, several hours later or only after repeated rainfall?
Step 2: Check the surrounding environment
Look for standing water, poor drainage, irrigation exposure and areas where water flows toward the fixture.
Step 3: Inspect the visible fixture condition
Look for fogging, water droplets, cracks, damaged glass and visible corrosion.
Step 4: Check the electrical connection system
Have a qualified technician inspect cable connections, junction boxes, connectors and the relevant driver or power supply.
Step 5: Determine whether the problem is isolated or widespread
If one fixture fails, the problem may be localized. If several fixtures in the same area fail, investigate shared environmental conditions or electrical connections.
Important safety note: Isolate the electrical circuit before inspection. Do not open or handle electrical connections while they are energized or wet. Electrical testing and repairs should be performed by qualified personnel.
4. How Can Project Buyers Reduce Water-Related LED Inground Light Failures?
Preventing repeated failures requires attention to the complete lighting system, rather than relying on the fixture enclosure alone.
4.1 Check the Sealing Structure
Ask the manufacturer about the construction of the lens seal, housing interface, cable entry and assembly process.
A well-designed sealing structure should maintain consistent contact across the relevant interfaces.
4.2 Evaluate Cable and Connector Protection
Confirm how the fixture connects to the power supply and how external cable connections are protected.
For outdoor projects, the connection system deserves the same attention as the lighting fixture itself.
4.3 Consider the Actual Drainage ConditionsOutdoor ground lighting solutions
Evaluate the soil, paving, water flow and underground connection locations.
Where water accumulation is expected, the project design should address drainage and the suitability of the complete electrical installation.
4.4 Ask About Testing and Quality Control
Useful questions for an LED inground light manufacturer include:
How are sealing components inspected during production?
What tests are performed on the assembled fixture?
How are cable entry points and connection interfaces evaluated?
Is there a documented inspection process for finished products?
Can the manufacturer provide relevant test reports for the proposed model?
Testing should reflect the actual product design and intended application. A single test result cannot replace proper installation design and site assessment.
5. What Should You Ask an LED Inground Light Manufacturer?
For landscape contractors, lighting designers and engineering procurement teams, the following questions can help evaluate a product more effectively:
What sealing materials are used around the glass lens and housing?
How is the cable entry point designed and protected?
Are external connectors or junction boxes included?
What testing is performed on the complete assembled fixture?
Is the product suitable for the expected soil and drainage conditions?
Are replacement parts or technical support available?
It is also important to distinguish water protection from mechanical load capacity. A fixture's water protection performance does not automatically indicate that it is suitable for vehicle traffic or other mechanical loads. These requirements should be evaluated separately.
6. Frequently Asked Questions About LED Inground Light Failure
Q1: Why does my LED inground light have water inside after heavy rain?
Possible causes include damaged sealing components, water entering through cable connections, cracks in the housing or unsuitable drainage conditions. The fixture and its external electrical connections should both be inspected.
Q2: Is foggy glass inside an LED inground light always a sign of water leakage?
No. Temporary condensation can occur when humid air inside the fixture meets a cooler glass surface. However, persistent fogging, visible droplets or accumulated water require further inspection.
Q3: Why does my ground light stop working after rain but work again when it dries?
Moisture may be affecting an electrical connection, connector, driver or internal component. The light may temporarily recover after drying, but the underlying cause can remain. Repeated operation after drying does not prove that the fixture is safe or fully functional.
Q4: Can water enter an LED inground light through its cable?
Yes. Damaged cable jackets, poorly protected cable entries, connectors or underground junction boxes can provide a path for moisture. The complete cable and connection system should be checked.
Q5: Should an LED inground light be replaced if water is found inside?
Not every case requires immediate replacement, but visible internal water is a serious warning sign. The circuit should be isolated, and a qualified technician should assess the fixture, electrical components and connection system. Replacement may be necessary if sealing or electrical components are damaged.
Q6: What is the most important factor when choosing LED inground lights for rainy outdoor environments?
Consider the complete system: fixture sealing, cable entry protection, connection design, material durability and site drainage. No single specification can compensate for weaknesses in the other parts of the installation.
Conclusion: Diagnose the Moisture Source Before Replacing the Fixture
LED inground light failure after heavy rain is not always caused by a problem with the lamp body. Moisture may enter through sealing interfaces, cable connections or damaged components, while poor drainage can keep the entire installation exposed to water for too long.
Foggy glass, internal droplets, accumulated water and intermittent operation are different symptoms. Correctly identifying the source helps contractors avoid unnecessary replacements and reduce recurring maintenance costs.
For outdoor landscape and architectural lighting projects, choosing a suitable LED inground light means evaluating the fixture, its electrical connections and the actual installation environment together.
Looking for LED inground lights for an outdoor project? Contact Always Lighting to discuss your application, installation conditions and product requirements.Contact our lighting team