
- 01 Nov 2026
Why Do LED Inground Lights Create Uneven Lighting on Walls and Trees?
Introduction
Uneven lighting is one of the most common LED inground lighting problems in outdoor architectural and landscape projects.
Even when high-quality LED inground lights are installed, walls and trees may still show visible bright spots, dark areas, uneven light distribution, or excessive brightness in certain sections.
Why does this happen?
The main causes of uneven uplighting are incorrect beam angle selection, unsuitable installation distance, poor optical design, improper fixture positioning, and insufficient overlap between light beams.
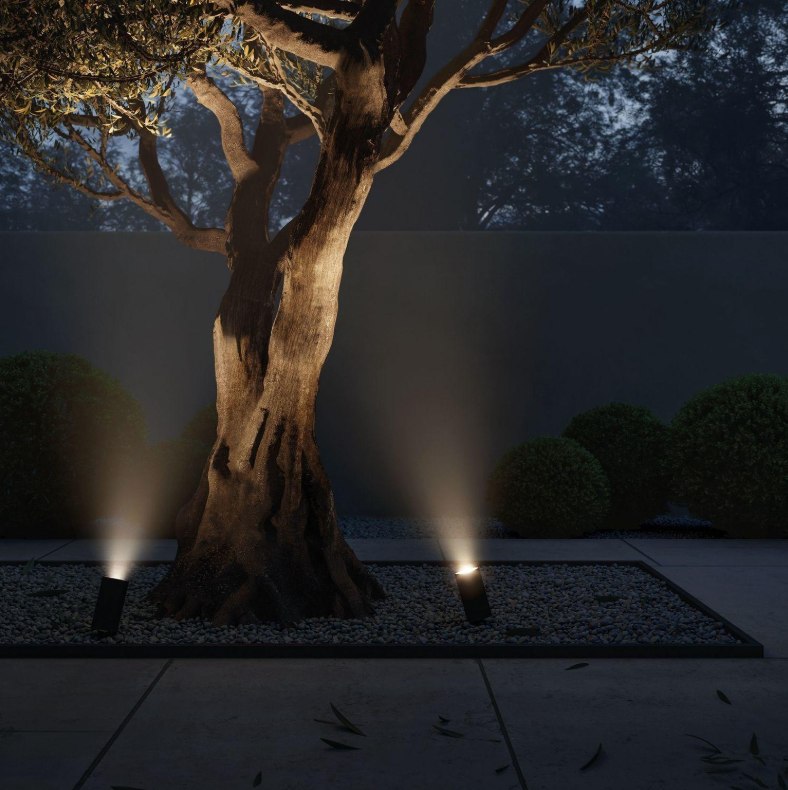
For building facades, these problems can create inconsistent vertical illumination and unwanted bright spots. For trees, they can result in brightly illuminated trunks but dark branches and canopies.
This guide explains the common causes of uneven lighting and provides practical solutions to help lighting designers, landscape contractors, and project engineers improve LED inground light beam distribution.
1. What Causes Uneven Lighting from LED Inground Lights?
Uneven lighting occurs when the light distribution across a target surface is inconsistent with the intended lighting effect.
It can appear in several forms:
Hot Spots: Certain areas are excessively bright compared with surrounding surfaces.
Dark Spots: Some sections receive insufficient light.
Uneven Beam Distribution: Light is concentrated in some areas instead of being distributed smoothly.
Excessive Overlapping: Multiple fixtures create overly bright areas where their beams intersect.
Light Spill: Light extends beyond the intended target area.
Uneven Vertical Illumination: The lower section of a wall is bright while the upper section remains dark.
These problems are usually related to the combination of optical performance, installation geometry, fixture output, and surrounding environmental conditions.
Understanding the actual cause is the first step toward improving the lighting result.
2. Incorrect Beam Angle Selection
Beam angle is one of the most important factors affecting LED inground light beam distribution.
A narrow beam concentrates light into a smaller area, while a wider beam distributes light over a larger area.
If the selected beam angle does not match the target dimensions and installation distance, uneven lighting may occur.
Common Beam Angle ProblemsLED Inground Light Beam Angle
Using a Narrow Beam for a Wide Wall
A 10° or 15° LED inground spotlight may create a concentrated bright area on a wide wall, leaving dark sections on both sides.
Using a Wide Beam for a Narrow Column
A 45° or 60° beam may spread light beyond the column, producing unwanted light spill and reducing the visual emphasis.
Using the Same Beam Angle for Different Trees
A narrow beam may work well for a tall, narrow tree but may not provide sufficient coverage for a wide canopy.
How to Solve It
Select the beam angle according to:
Target width and height.
Distance between the fixture and target.
Desired illumination coverage.
Required lighting intensity.
Surrounding structures and viewing positions.
The following table provides general selection references:
| Beam Angle | Typical Applications | Lighting Effect |
|---|---|---|
| 10° | Narrow columns and architectural details | Focused illumination |
| 15° | Tall trees and narrow structures | Controlled uplighting |
| 30° | Medium trees and landscape features | Balanced coverage |
| 45° | Wider walls and landscape elements | Broad illumination |
| 60° | Wide and low surfaces | Wider light distribution |
The actual beam distribution should always be checked against the manufacturer's IES or LDT photometric data.
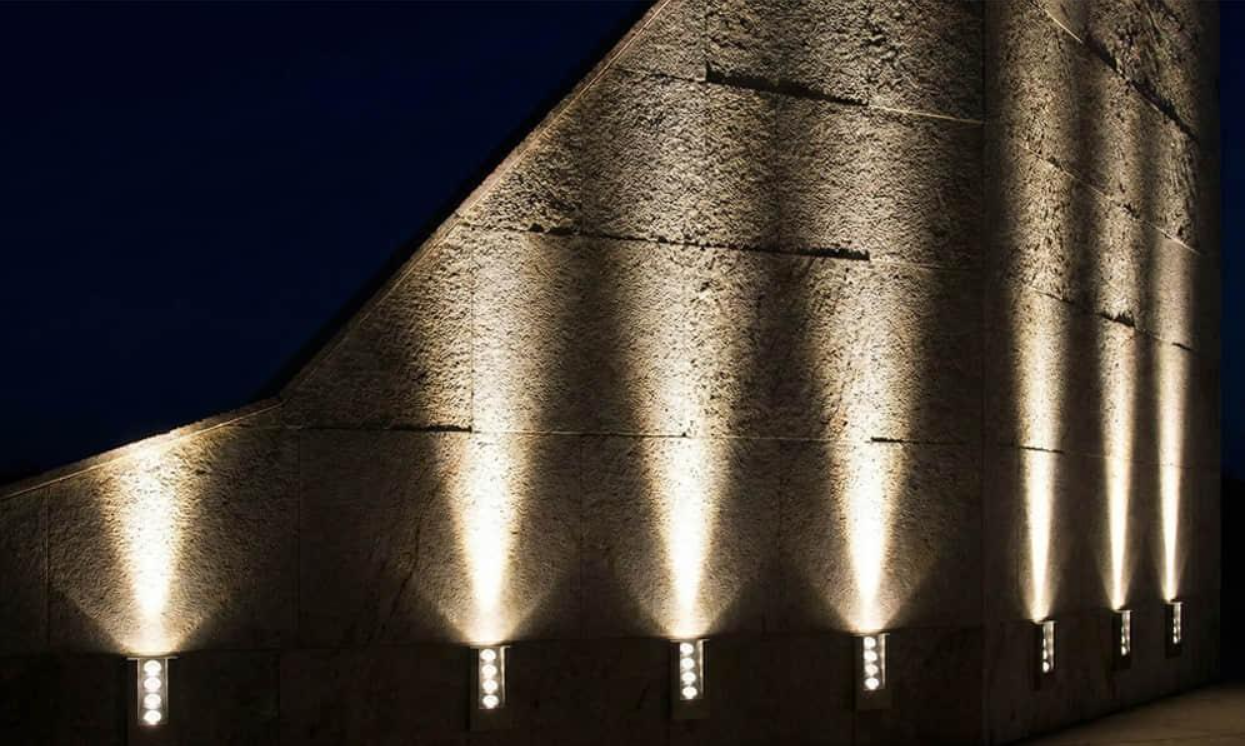
3. Incorrect Installation Distance Between the Fixture and TargetLED Inground Light Spacing
Installation distance directly affects the illuminated area and light intensity.
If a fixture is installed too close to a wall, the beam may create a concentrated bright spot.
If it is installed too far away, the illuminated area may become wider, but the light intensity on the target may decrease.
For an idealized beam, the approximate beam diameter can be calculated using:
Beam Diameter = 2 × Distance × tan(Beam Angle ÷ 2)
For example, consider a 30° LED inground light:
| Installation Distance | Approximate Beam Diameter |
|---|---|
| 1m | 0.54m |
| 2m | 1.07m |
| 3m | 1.61m |
| 4m | 2.14m |
This calculation helps estimate the geometric beam footprint at different distances.
However, it does not indicate how evenly the surface will be illuminated. Actual brightness distribution depends on the optical system and luminous intensity.
How to Solve It
Before installation:
Measure the distance between the fixture and the target.
Calculate the approximate beam footprint.
Check whether the beam width matches the target dimensions.
Evaluate potential overlap between neighboring fixtures.
Test a sample fixture at the actual installation position.
For large architectural projects, lighting simulation is recommended before finalizing the fixture layout.
4. Poor Optical Design and Uneven Beam Distribution
Not all LED inground lights provide the same lighting performance, even when they have identical wattage and nominal beam angles.
The optical system plays a major role in determining how evenly light is distributed.
Important optical components include:
LED chips.
Optical lenses.
Reflectors.
Secondary optical systems.
Glass covers and protective components.
A poorly designed optical system may produce an irregular beam pattern, visible rings, concentrated hotspots, or uneven light distribution.
Common Optical Problems
1. Low-Quality Lenses
Poor lens quality or inconsistent optical manufacturing may cause irregular light distribution.
2. Incorrect Optical Design
An optical system that does not match the intended application may concentrate too much light in the center or create unwanted spill.
3. Inconsistent LED Output
Differences in LED chip performance or product manufacturing consistency may lead to variations in brightness between fixtures.
4. Dirty or Damaged Optical Components
Dust, water stains, condensation, or damaged protective glass can affect light transmission and create an inconsistent appearance.
How to Solve It
When selecting LED inground lights for professional projects:
Check the actual beam distribution.
Request IES or LDT photometric files.
Review the optical lens design.
Compare the light distribution of different fixtures.
Check product consistency through sample testing.
Inspect protective glass and optical components before installation.
For commercial and architectural projects, photometric performance is more important than wattage alone.
5. Incorrect Fixture Positioning and Spacing
Even with suitable LED inground lights, incorrect fixture positioning can create uneven lighting.
This is particularly common when illuminating long building walls, repeated columns, and rows of trees.
For Building Walls
When fixtures are installed too far apart, dark gaps may appear between illuminated sections.
When they are too close together, overlapping beams may create excessively bright areas.
For Trees
When all fixtures are installed on only one side of a tree, the front may appear bright while the opposite side and branches remain dark.
How to Solve It
For Building Walls:
Maintain consistent fixture spacing.
Select suitable beam angles for the wall height.
Evaluate the overlap between adjacent beams.
Check illumination across the entire wall surface.
For Trees:
Consider using two or more fixtures around larger trees.
Position fixtures at different angles to illuminate different sections.
Avoid placing fixtures directly behind obstacles.
Adjust the beam direction to highlight the trunk and canopy.
For repeated architectural elements, maintaining consistent fixture positions and aiming directions is essential.
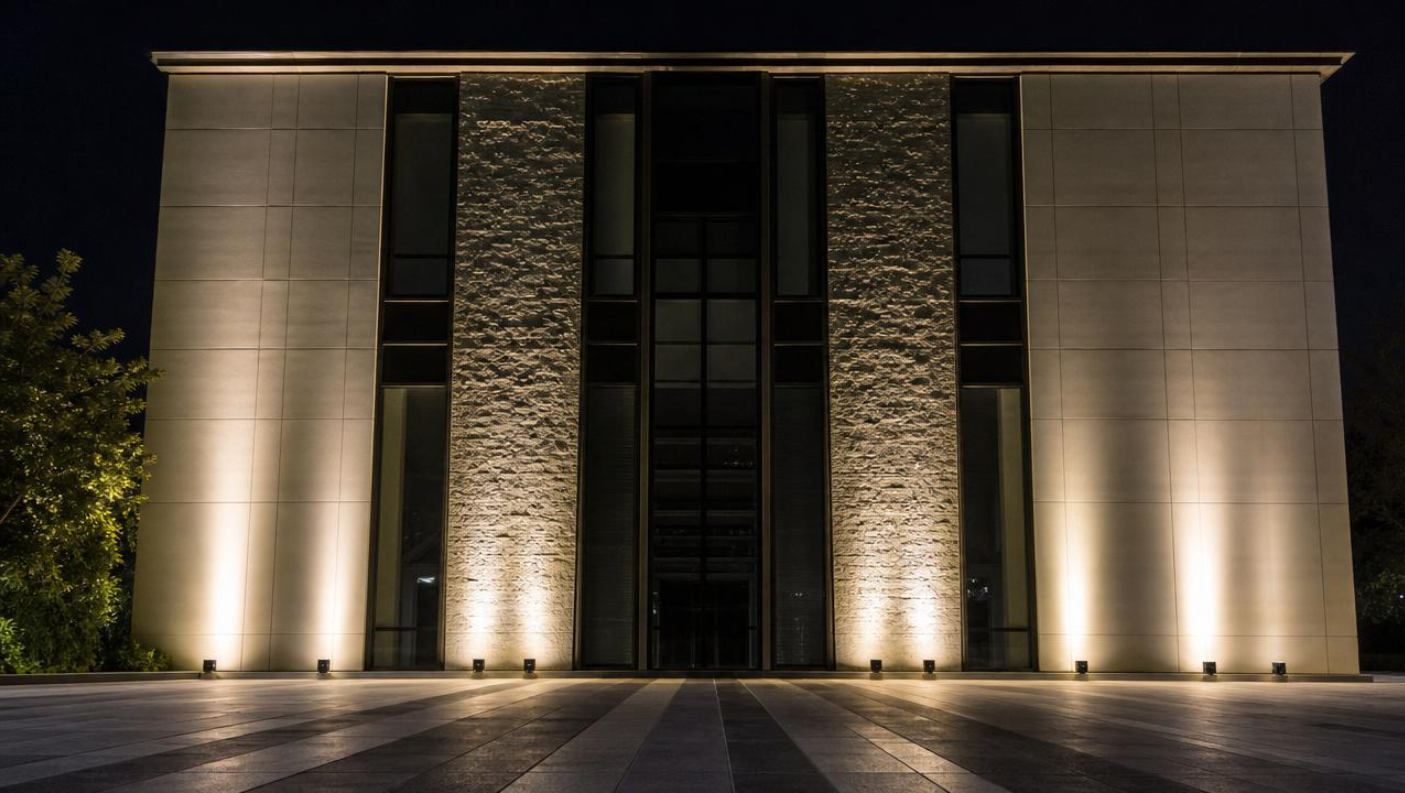
6. Why Do LED Inground Lights Create Uneven Lighting on Building Walls?
Building wall uplighting is especially sensitive to fixture distance, beam angle, wall texture, and fixture arrangement.
Common problems include:
A. Bright Spots at the Bottom of the Wall
This usually happens when fixtures are installed too close to the wall or use a beam that is too concentrated for the required coverage.
Solution: Evaluate the installation setback and consider a wider beam or a different optical distribution.
B. Dark Areas Between Fixtures
This often occurs when fixture spacing is too wide or adjacent beams do not provide sufficient illumination overlap.
Solution: Adjust fixture spacing, use an appropriate beam angle, or introduce additional fixtures where necessary.
C. Uneven Illumination from Bottom to Top
The lower wall may appear bright while the upper section remains dark.
Possible causes include insufficient luminous output at the target distance, unsuitable beam distribution, or incorrect fixture aiming.
Solution: Review the vertical illumination requirements and consider a different optical distribution or fixture arrangement.
D. Uneven Lighting on Textured Walls
Stone, brick, concrete, and other textured surfaces reflect light differently.
Even with consistent fixture output, surface irregularities can create shadows and visual brightness variations.
Solution: Evaluate the desired grazing or washing effect and test the selected optical system on the actual wall material.
For large building facades, a lighting simulation can help identify dark areas before installation.
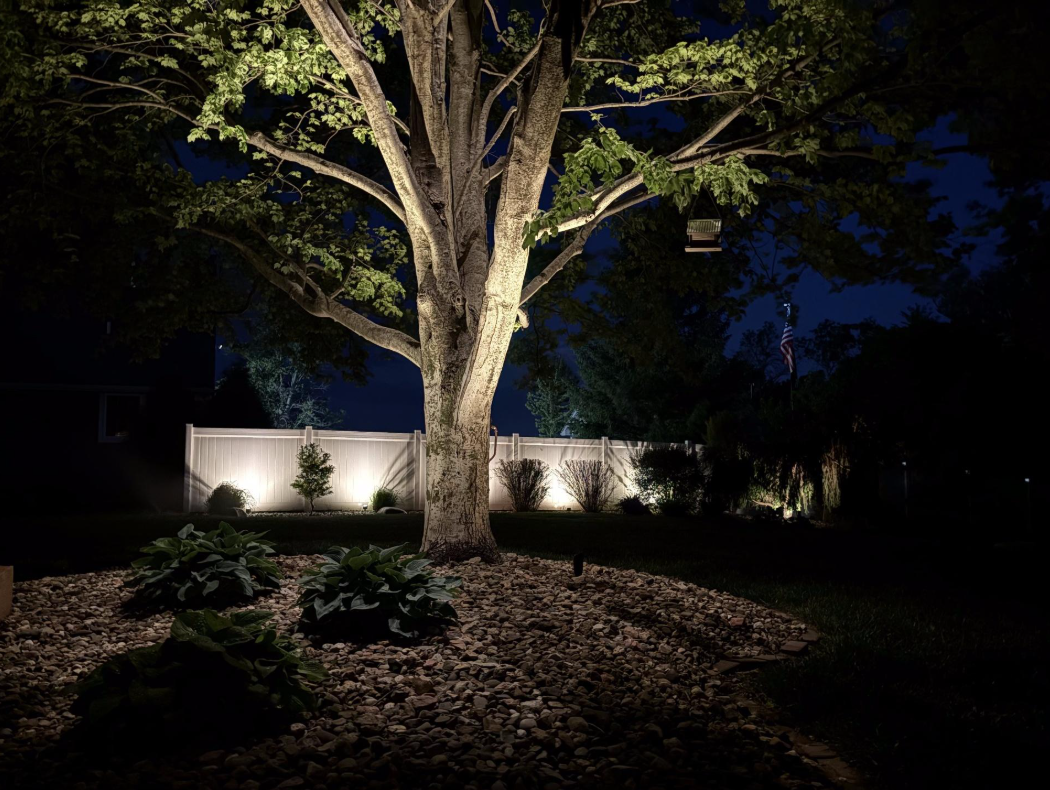
7. Why Do Trees Look Unevenly Illuminated by LED Inground Lights?
Tree uplighting is different from wall lighting because trees have irregular shapes, branches, leaves, and changing canopy structures.
A lighting arrangement that works for a building column may not work for a tree.
Common Tree Lighting ProblemsMini LED Inground Lights
Bright Trunk but Dark Canopy
The beam is too narrow or the fixture is positioned too close to the trunk.
One Side of the Tree Is Too Bright
All fixtures are installed from the same direction.
Dark Areas Between Branches
Branches and leaves block light from reaching other sections of the canopy.
Excessive Light Spill Around the Tree
The selected beam angle is too wide or the fixture is incorrectly aimed.
Recommended Solutions
Use 15°–30° beams as a starting point for many focused tree uplighting applications.
Consider wider beams for broad tree canopies.
Use multiple fixtures for larger trees.
Position fixtures at different angles to create natural depth.
Adjust fixture locations according to trunk width and canopy structure.
Avoid excessive illumination of surrounding areas.
The goal is not to make every part of a tree equally bright. Instead, the lighting should highlight the tree's natural structure while maintaining visual balance.
8. How to Improve LED Inground Lighting Uniformity: A Practical Checklist
Before completing an outdoor lighting installation, project engineers can use the following checklist.
| Inspection Item | What to Check | Expected Result |
|---|---|---|
| Beam Angle | Does it match the target dimensions? | Appropriate coverage |
| Installation Distance | Is the fixture positioned correctly? | Balanced beam footprint |
| Fixture Spacing | Is there sufficient beam overlap? | Reduced dark gaps |
| Optical Design | Is the light distribution consistent? | Fewer hotspots |
| LED Output | Are all fixtures consistent? | Balanced brightness |
| Fixture Position | Are aiming directions correct? | Better target coverage |
| Surface Condition | Does the target reflect light evenly? | More predictable results |
| Photometric Data | Have IES/LDT files been checked? | Better design accuracy |
For critical architectural projects, the final installation should be verified through on-site testing or lighting measurements.
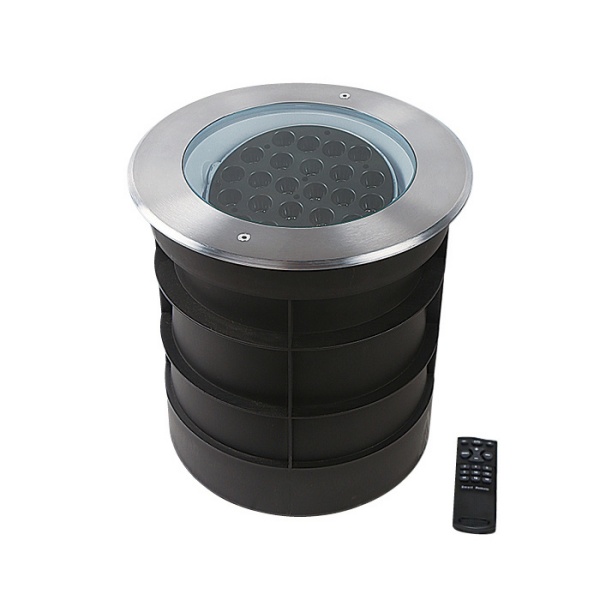
9. How to Select the Right LED Inground Lights for Better Lighting ResultsOutdoor LED Inground Lights
Selecting suitable LED inground lights is essential for achieving reliable outdoor lighting performance.
Before choosing products, consider the following specifications:
| Specification | What to Consider |
|---|---|
| Beam Angle | 10°, 15°, 30°, 45°, or 60° |
| Power | Suitable for the target height and distance |
| Lumen Output | Actual fixture lumen output |
| Color Temperature | 2700K, 3000K, 4000K, or project requirements |
| Optical Lens | Beam uniformity and distribution |
| LED Chip | Brand, efficacy, and consistency |
| Housing Material | Stainless steel or suitable outdoor-grade aluminum |
| Waterproof Rating | Appropriate protection for the installation environment |
| Photometric Data | IES or LDT files |
| Installation Design | Mounting sleeve, recessed depth, and cable access |
One important point: a high-wattage fixture does not automatically provide better lighting uniformity.
A suitable optical design, correct installation distance, and appropriate fixture arrangement are equally important.
10. Why Choose Always Lighting for LED Inground Lighting Projects?
Always Lighting provides outdoor LED lighting solutions for architectural, landscape, and commercial applications.
Our LED inground lighting products can be considered for projects involving:
Building facade uplighting.
Hotel entrances and outdoor landscapes.
Garden and park tree lighting.
Architectural columns and decorative structures.
Commercial outdoor lighting projects.
For different project requirements, product selection should consider beam angle, optical performance, power, color temperature, housing material, and installation conditions.
Our team can help evaluate suitable LED inground light configurations based on your project drawings, target dimensions, and desired lighting effects.
Need Help Solving Uneven LED Inground Lighting Problems?
If you are experiencing hotspots, dark areas, or inconsistent uplighting, share your project photos or lighting layout with Always Lighting.
Our team can help you review the application and recommend suitable LED inground light options for your project.
Frequently Asked Questions (FAQ)
1. Why do LED inground lights create bright spots on walls?
Bright spots may occur when the beam angle is too narrow, the fixture is installed too close to the wall, or the optical system concentrates too much light in one area. Adjusting the installation distance and selecting a more suitable beam distribution can help improve the result.
2. How do I fix uneven uplighting on building facades?
Check the beam angle, fixture spacing, installation distance, and optical distribution. Use suitable beam overlap and verify the lighting layout with IES/LDT photometric data or lighting simulation.
3. What causes dark spots between LED inground lights?
Dark spots commonly occur when fixtures are installed too far apart or their beams do not provide sufficient overlapping illumination. Incorrect beam angles and insufficient light output may also contribute.
4. What is the best beam angle for wall uplighting?
A 30°–45° beam is a useful starting point for many medium-sized wall sections. Narrower beams may be suitable for architectural details, while wider beams may be appropriate for broad surfaces. The final choice depends on wall height, fixture distance, and the required lighting effect.
5. How can I illuminate trees more evenly with inground lights?
Consider the tree's height, trunk width, and canopy structure. Use multiple fixtures at different positions for larger trees and select beam angles that match the target dimensions. Avoid illuminating the entire tree from only one direction when broader coverage is required.
6. Does a wider beam angle reduce dark spots?
A wider beam can increase geometric coverage, but it does not automatically guarantee uniform illumination. Actual light intensity distribution, installation distance, and fixture output must also be considered.
7. Can different LED inground lights create different lighting effects?
Yes. Different LED chips, optical lenses, reflectors, beam angles, and lumen outputs can produce different lighting distributions, even when fixtures have similar wattage.
8. How do I check LED inground light beam distribution before purchasing?
Request IES or LDT photometric files from the manufacturer. These files provide information about luminous intensity distribution and can be used in professional lighting simulation software.
9. Why does the same LED inground light look different on different walls?
Wall color, texture, reflectance, surface irregularities, and surrounding lighting conditions can change the perceived brightness and uniformity of the illuminated surface.
10. Should I test LED inground lights before installing them in a large project?
Yes. Testing sample fixtures at the actual installation distance and position can help identify beam distribution problems before completing the full installation.
Conclusion
Uneven lighting from LED inground lights is usually caused by a combination of incorrect beam angle selection, unsuitable installation distance, poor optical design, and improper fixture positioning.
Whether you are illuminating trees, building columns, landscape walls, or architectural facades, achieving balanced lighting requires more than simply selecting a high-power LED fixture.
By evaluating beam distribution, target dimensions, installation geometry, and fixture spacing, project engineers can reduce hotspots, dark areas, and unwanted light spill.
Looking for reliable LED inground lighting solutions? Contact Always Lighting to discuss your outdoor landscape and architectural lighting project.LED Inground Lighting Solutions