
- 18 Oct 2026
How to Plan an LED Lighting Layout for Jewelry Display Cabinets
How to Plan an LED Lighting Layout for Jewelry Display Cabinets
Planning the right LED lighting layout for jewelry display cabinets helps retailers present gold jewelry, diamonds, gemstones, watches, and other premium products effectively.
A good lighting layout should provide appropriate illumination, highlight important merchandise, maintain consistent color appearance, and minimize distracting reflections from glass surfaces.
The best way to plan jewelry showcase lighting is to start with the cabinet dimensions and merchandise layout, select suitable linear lights and spotlights, determine their mounting positions, and test the complete arrangement before mass production or installation.
For jewelry retailers, display cabinet manufacturers, lighting wholesalers, and retail fit-out contractors, a well-planned lighting layout can also simplify wiring, installation, maintenance, and repeat orders across multiple stores.
This guide explains how to plan an LED cabinet lighting layout step by step, from fixture selection and beam angles to glare control and electrical requirements.
1. Understand the Jewelry Display Cabinet Before Choosing Lights
The first step is to understand the cabinet structure and the products it will display.
Different showcase designs require different lighting arrangements. A long jewelry counter may need continuous illumination, while a cabinet displaying individual rings may benefit from focused accent lighting.
Before selecting any fixtures, collect the following information:
Cabinet length, width, and height.
Shelf dimensions and spacing.
Glass panel positions and customer viewing angles.
Available mounting space for linear lights and spotlights.
Type and arrangement of the displayed jewelry.
Available electrical connections and driver locations.
Required color temperature and color-rendering performance.
If the cabinet is being manufactured to order, request the latest cabinet drawings before deciding where to install the lights.
Identify the Main Display Areas
Divide the cabinet into practical lighting zones.
General display zone: The main area containing rows of jewelry or merchandise.
Accent display zone: Areas containing featured products that need more focused illumination.
Upper display zone: The area above or near the showcase where gantry lights or other fixtures may be installed.
Lower shelf or recessed zone: Areas that may need compact fixtures because of limited mounting space.
This zoning approach helps determine which fixtures should provide general illumination and which should provide accent lighting.
2. Choose the Right Combination of LED Cabinet Lights
A jewelry display lighting layout often works best when different fixture types are selected according to their intended functions.
Linear LED Cabinet Lights for General Illumination
Linear cabinet lights distribute light along a longer section of a cabinet or shelf.
They are worth considering for jewelry counters, glass display cases, and showcases containing several products in a continuous row.
A suitable layout can provide relatively continuous illumination, although the final result depends on fixture length, optical design, mounting position, and cabinet geometry.
Explore Always Lighting LED Cabinet Linear Light.
Mini LED Spotlights for Accent Lighting
Mini LED spotlights direct light toward selected products or smaller display areas.
They can be useful for emphasizing rings, pendants, watches, and featured jewelry pieces.
When planning spotlight positions, consider beam angle, distance from the merchandise, aiming direction, and possible reflections on glass.
Explore Always Lighting 1W Recessed LED Cabinet Spotlight.
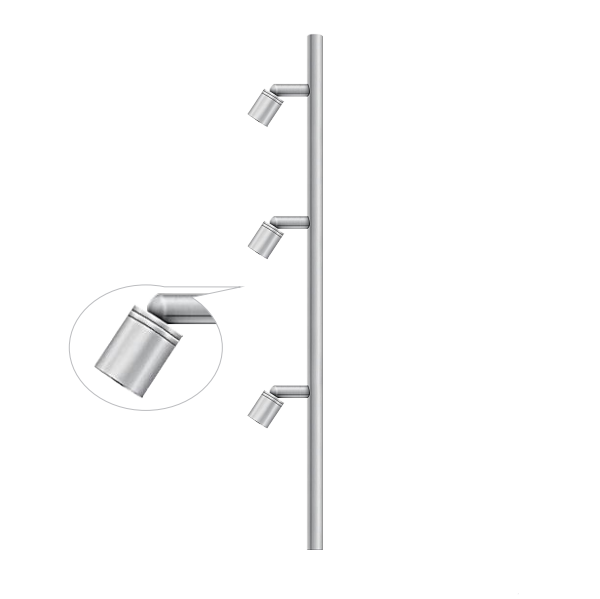
Gantry Lights for Integrated Showcase Lighting
For suitable cabinet designs, gantry lighting can be integrated into the supporting structure above the display area.
This arrangement may be particularly useful for showcase manufacturers who need to coordinate the lighting position, cabinet frame, electrical wiring, and installation process.
Explore Always Lighting LED Showcase Gantry Light.
Which Combination Should You Choose?
| Display Requirement | Layout to Evaluate |
|---|---|
| Long jewelry counter | Linear cabinet lighting along suitable display sections |
| Individual rings or featured products | Mini LED spotlights aimed at selected items |
| Integrated showcase frame | Gantry lighting compatible with the cabinet structure |
| Mixed jewelry collection | Linear lighting combined with selected accent spotlights |
| Multi-store retail project | Standardized fixture positions and documented specifications |
These are starting points for design, not fixed rules. The actual fixture combination should be confirmed through the cabinet drawings and lighting tests.
3. Plan the Positions of Linear Lights and Spotlights
Fixture placement affects illumination uniformity, product visibility, shadows, and reflections.
A light that is correctly specified can still produce a poor result if it is positioned incorrectly.
Where Should Linear Cabinet Lights Be Installed?
Linear cabinet lights may be positioned along suitable cabinet edges, frames, or shelf sections, depending on the product's mounting design.
When planning the position, consider:
Whether the light can illuminate the full display section.
The distance between the fixture and the jewelry.
Whether the fixture is visible from the customer's viewing position.
Whether shelves or cabinet frames obstruct the light.
Whether the wiring and power supply remain accessible for maintenance.
For longer counters, divide the cabinet into sections and check how the selected fixture lengths fit the actual dimensions.
Do not assume that every linear fixture can be connected continuously or cut to any length. Confirm the permitted connection arrangement and available product lengths with the manufacturer.
Where Should Mini Spotlights Be Installed?
Mini spotlights should be positioned according to the target product and the desired lighting effect.
For example, a spotlight can be aimed at a ring or pendant to create focused illumination, while additional fixtures may illuminate other products in the display.
Check the following before fixing the position:
Distance between the spotlight and the jewelry.
Beam angle and illuminated area.
Mounting depth and cabinet cutout requirements.
Whether the beam overlaps with neighboring spotlights.
Whether the light source or its reflection is visible to customers.
A practical way to plan spotlight placement is to mark each target area on the cabinet drawing and then compare possible fixture positions before manufacturing the cabinet.
Plan for Shadows
Jewelry pieces, shelves, cabinet frames, and display stands can block light from reaching certain areas.
Review the cabinet in three dimensions rather than planning solely from a top-down drawing.
Where shadows are excessive, consider adjusting the fixture position, beam direction, or combination of lighting types.
4. Select the Right Beam Angle for Each Display Area
Beam angle determines how light spreads from a fixture and helps designers estimate the area covered by a beam.
A narrower beam generally concentrates light over a smaller area, while a wider beam can distribute light across a larger area under comparable conditions.
For jewelry showcases, beam angle should be selected together with mounting height, target distance, fixture output, and cabinet geometry.
Narrow Beam Angles for Focused Accent Lighting
A narrow beam may be suitable for highlighting individual jewelry pieces or small display areas.
However, when the fixture is too close to the merchandise or aimed incorrectly, the result can include strong hotspots or uneven brightness.
Wider Beam Angles for General Illumination
A wider beam may be useful when illuminating a larger shelf or display area.
The final coverage will still depend on the fixture's actual light distribution and mounting position.
How to Estimate Beam Coverage
For an idealized beam with a full beam angle (\theta), the approximate beam diameter at distance (d) can be estimated as:
[
D \approx 2d\tan\left(\frac{\theta}{2}\right)
]
Here, (D) is the approximate beam diameter and (d) is the distance from the light source to the target surface.
This relationship is useful for preliminary planning, but it does not predict exact illuminance, uniformity, or the visible beam edge in a real cabinet.
For final design, use the manufacturer's photometric data or a lighting simulation where appropriate, followed by a physical test.
5. Choose the Right Brightness for the Display
A common mistake is selecting fixtures based only on wattage.
Wattage measures electrical power consumption, not the amount of useful light reaching the merchandise.
Two fixtures with similar power consumption can produce different results because of differences in LED efficiency, optics, beam angle, mounting position, and light distribution.
Consider Illuminance, Not Just Wattage
Luminous flux is measured in lumens, while illuminance on a surface is measured in lux.
For jewelry showcase planning, the important question is whether the light reaching the displayed products provides suitable visibility and contrast for the intended application.
A lighting designer may use illuminance targets and uniformity criteria to evaluate the layout. The applicable values should be determined from the project's design requirements, rather than applying one universal lux figure to every jewelry cabinet.
Avoid Excessive Brightness
More light does not always produce a better display.
Excessive output can create bright spots, distracting reflections, and uncomfortable viewing conditions.
Instead, evaluate the lighting arrangement from the customer's normal viewing position and balance the illumination of the merchandise against the surrounding store environment.
For projects with compatible dimming options, adjustable output may help refine the final effect. Always verify dimming compatibility with the selected fixture and driver.
6. Select CRI and Color Temperature for the Jewelry
The layout should be designed around the actual merchandise, not only the cabinet dimensions.
Color rendering and color temperature influence how gold, diamonds, gemstones, watches, and other products appear.
CRI for Jewelry Showcase Lighting
Color rendering index (CRI) describes how a light source renders colors compared with a reference light source under specified conditions.
For color-sensitive jewelry displays, CRI 90 or higher is worth evaluating. The final requirement should be confirmed according to the merchandise and project expectations.
Do not assume every LED cabinet light marketed for jewelry has the same CRI. Verify the specification for each selected model.
Read the related guide: What CRI Is Best for Jewelry Display Lighting?.
Color Temperature for Different Jewelry
Common options include 3000K, 4000K, and 6000K.
3000K: A warm-white appearance that may complement selected gold displays and warm retail interiors.
4000K: A neutral-white appearance that may suit mixed collections and balanced retail presentation.
6000K: A cool-white appearance that may suit selected contemporary displays.
These are general starting points rather than fixed recommendations. Compare the actual merchandise under the proposed lighting, especially when a showcase contains different types of jewelry.
For more information, see 3000K vs 4000K vs 6000K: Best Jewelry Display Lighting.
7. Reduce Glare and Reflections in Glass Display Cabinets
Glass reflections should be considered during layout planning rather than addressed only after installation.
A light can illuminate the jewelry effectively while creating a reflected image of the fixture on the front glass.
Check the Customer's Viewing Angle
Review the display from the positions where customers will normally stand or sit.
If a reflected light source overlaps with the merchandise, consider changing the fixture's position or aiming direction.
Control Bright Spots
Use suitable beam angles and fixture positions to avoid excessive overlap or concentrated bright spots.
For some cabinets, linear lighting may provide a more continuous visual effect. For others, carefully positioned spotlights may be more suitable.
Neither fixture type is automatically glare-free.
Review Surrounding Lighting
Ceiling lights, windows, track lights, and neighboring showcases can also create reflections.
Evaluate the cabinet together with the surrounding store lighting. Adjusting an external source may sometimes be more effective than changing the internal cabinet lights.
Read the related guide: How to Reduce Glare and Reflections in Glass Display Cabinets.
8. Plan Electrical Connections, Drivers, and Maintenance Access
A lighting layout must be practical to install and maintain, particularly in projects involving multiple showcases.
Before approving the cabinet drawing, confirm the electrical and mechanical requirements for every fixture.
Confirm Input Voltage and Driver Compatibility
Check the selected model's input specifications and determine what driver or power supply is required.
Do not assume that all cabinet lights operate at the same voltage or can share the same driver.
Calculate the Total Connected Load
Prepare a fixture schedule listing the model, power rating, quantity, and required electrical configuration.
The total connected load can be calculated as:
[P_{\text{total}}=\sum_{i=1}^{n} P_i]
where (P_i) is the rated power of each fixture or fixture group.
The required power supply must then be selected according to the manufacturer's guidance, operating conditions, and applicable electrical requirements. Allowances for capacity, wiring, and voltage drop should be considered where relevant.
Confirm Wiring and Maintenance Access
Plan where cables will run, where connections will be made, and how drivers or power supplies will be accessed.
Ensure that installation does not obstruct shelves, cabinet doors, glass panels, or future maintenance.
For customized cabinets, finalize these details before cutting mounting holes or starting mass production.
9. Example: Planning Lighting for a Jewelry Display Counter
Consider a hypothetical jewelry counter with multiple products displayed along a long shelf.
A practical design process would be:
Step 1: Map the cabinet.
Record the cabinet length, shelf depth, jewelry positions, glass panels, and mounting space.
Step 2: Define the lighting zones.
Identify which sections need general illumination and which contain featured products requiring accent lighting.
Step 3: Select suitable fixtures.
Evaluate a linear cabinet light for longer display sections and mini spotlights for selected jewelry pieces.
Step 4: Mark the positions.
Add the fixture locations, beam directions, power supply, cable routes, and mounting requirements to the cabinet drawing.
Step 5: Check technical compatibility.
Confirm CRI, CCT, beam angle, luminous output, fixture dimensions, input voltage, and driver requirements.
Step 6: Test a sample section.
Install the proposed lights in a representative cabinet section and evaluate brightness, shadows, color appearance, and glass reflections.
Step 7: Finalize the layout.
Adjust the fixture positions where necessary and document the approved specifications before ordering the full quantity.
This process helps reduce the risk of discovering mounting conflicts or unwanted reflections after all cabinets have been manufactured.
10. LED Jewelry Display Lighting Layout Checklist for Bulk Projects
For jewelry retailers, showcase manufacturers, lighting wholesalers, and fit-out contractors, use the following checklist before approving the lighting layout.
Cabinet dimensions: Confirm all measurements and mounting positions.
Product arrangement: Identify the jewelry and the areas that require accent lighting.
Fixture selection: Choose suitable linear lights, spotlights, gantry lights, or a combination.
Beam angle: Check beam coverage and possible overlap.
Brightness: Review required illumination and uniformity.
Color rendering: Verify the CRI specifications for the selected models.
Color temperature: Confirm the approved CCT for the merchandise and store design.
Glare control: Check reflections from glass and polished surfaces.
Electrical design: Confirm input voltage, power supply, total load, and wiring routes.
Installation: Verify mounting holes, fixture depth, accessories, and maintenance access.
Sample approval: Test the actual lighting effect before bulk production.
Specification records: Document approved model numbers and layout drawings for repeat orders.
A complete fixture schedule and approved cabinet drawing can help buyers, cabinet manufacturers, and lighting suppliers coordinate the project more efficiently.
11. LED Jewelry Showcase Lighting Solutions from Always Lighting
Always Lighting provides LED lighting products for jewelry showcases, glass display cabinets, retail counters, and commercial display applications.
Depending on the cabinet design and project requirements, buyers can evaluate several lighting options.
LED Cabinet Linear Lights can be considered for longer display sections that require a continuous lighting arrangement.
Mini LED Cabinet Spotlights can be considered for focused illumination of selected jewelry pieces.
LED Showcase Gantry Lights may be suitable for cabinet designs that integrate lighting with a supporting frame.
Explore the Always Lighting Display Cabinet Lighting range to review available options.
For an accurate product recommendation, provide the following information:
Cabinet drawings or photographs.
Cabinet dimensions and shelf layout.
Type of jewelry or merchandise.
Preferred CRI and color temperature.
Desired lighting effect and beam angle.
Input voltage and driver requirements.
Estimated quantity and delivery schedule.
For customized showcases and larger retail projects, discussing these details before production helps confirm product fit, mounting arrangements, and electrical compatibility.
Frequently Asked Questions
1. How do you plan an LED lighting layout for jewelry display cabinets?
Start by measuring the cabinet and mapping the merchandise. Select suitable linear lights and spotlights, plan their mounting positions and beam angles, confirm electrical requirements, and test the proposed arrangement before mass production.
2. Should I use linear LED lights or spotlights in a jewelry showcase?
Linear lights can illuminate longer display sections, while spotlights can emphasize individual products. Many showcases are worth evaluating with a combination of both, depending on the merchandise, cabinet structure, and desired lighting effect.
3. How many LED cabinet lights do I need for a jewelry display cabinet?
The required quantity depends on cabinet dimensions, fixture output, beam angle, mounting distance, light distribution, and the target illumination. Use product photometric data and a sample test or lighting simulation rather than relying on cabinet length alone.
4. What beam angle is best for jewelry showcase lighting?
There is no single best beam angle for every cabinet. Narrower beams may suit focused accent lighting, while wider beams may be useful for larger display areas. The final choice depends on mounting position, target distance, and required coverage.
5. What CRI should I choose for jewelry cabinet lighting?
CRI 90 or higher is worth evaluating for color-sensitive jewelry displays. However, verify the actual specification for the selected product and consider sample testing, particularly when the cabinet contains colored gemstones or different metal finishes.
6. How can I prevent dark spots and uneven lighting inside the cabinet?
Review fixture spacing, beam angles, shelf positions, mounting distance, and obstructions. Linear lights may help provide more continuous illumination, while additional or repositioned fixtures may be needed in areas with poor coverage. Test the layout with the actual cabinet structure.
7. How can I reduce glass reflections in a jewelry showcase?
Evaluate the lighting from the customer's normal viewing position. Adjust fixture positions and aiming directions, check surrounding light sources, and avoid excessive brightness or poorly overlapping beams. For more detailed guidance, review the complete cabinet lighting arrangement before changing the glass or replacing all fixtures.
8. What information is required for a jewelry showcase lighting quotation?
Provide cabinet dimensions, layout drawings, merchandise type, preferred fixture type, color temperature, CRI requirement, input voltage, required quantity, and installation details. Photographs and a sample cabinet can help clarify the required lighting effect.
Conclusion: Plan the Lighting Layout Before Manufacturing the Cabinet
A successful LED lighting layout for jewelry display cabinets begins with the cabinet structure, merchandise arrangement, and intended lighting effect.
Linear cabinet lights can illuminate longer display sections, while mini spotlights can emphasize selected jewelry pieces. The final arrangement should also account for beam angle, brightness, CRI, color temperature, glass reflections, electrical compatibility, and maintenance access.
For display cabinet manufacturers, jewelry retailers, wholesalers, and retail contractors, planning these requirements before production can reduce installation changes and improve consistency across multiple showcases.
Looking for LED lighting for your jewelry display cabinet project?
Contact Always Lighting with your cabinet drawings, dimensions, required quantity, and lighting preferences to discuss suitable cabinet linear lights, mini spotlights, and other showcase lighting options.
Explore Display Cabinet Lighting | Contact Always Lighting