
Choosing the correct LED flood light beam angle can significantly affect the brightness, coverage and uniformity of an outdoor lighting project.
A 10° beam angle concentrates light into a narrow area, while a 60° beam angle provides much wider coverage. Between them, 15°, 30° and 45° beam angles offer different solutions for architectural facade lighting, bridges, hotels, commercial buildings and landscape projects.
So, which beam angle should you choose?
The answer depends mainly on installation distance, building height, facade width, target area and desired lighting effect.
This guide compares 10°, 15°, 30°, 45° and 60° LED flood lights to help lighting designers, engineers and contractors select the right optical solution.
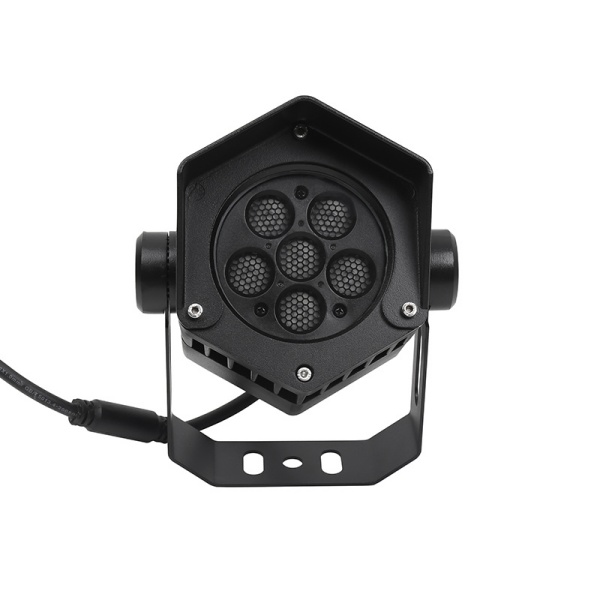
The beam angle describes how widely light spreads from an LED flood light.
A simple way to understand it is:
Narrow beam → concentrated light → longer projection
Wide beam → broader coverage → shorter projection
For example, a 10° flood light concentrates light into a relatively narrow area, while a 60° flood light spreads light over a much wider surface.
Beam angle affects:
Lighting coverage
Light intensity
Projection distance
Uniformity
Number of fixtures
Light spill
Glare
Architectural lighting effects
Therefore, beam angle should be selected together with lumens, wattage, installation distance and mounting height.
Here is a quick comparison:
| Beam Angle | Beam Type | Best For | Typical Applications |
|---|---|---|---|
| 10° | Very narrow | Long-distance accent lighting | Towers, columns, architectural details |
| 15° | Narrow | Accent and vertical structures | Columns, facades, monuments |
| 30° | Medium | Focused facade lighting | Hotels, commercial buildings |
| 45° | Medium-wide | General facade lighting | Building facades, walls |
| 60° | Wide | Large-area illumination | Large facades, short-distance lighting |
Important: These are general guidelines. The final beam angle should be selected according to the actual project dimensions and photometric data.
A 10° beam angle is a narrow optical distribution that concentrates light into a relatively small area.
Because the light is more concentrated, it can be useful when the fixture is installed relatively far from the target.
High-rise building details
Towers
Columns
Monuments
Statues
Architectural features
Long-distance accent lighting
Strong light concentration
Suitable for long projection distances
Good for highlighting specific architectural elements
Helps minimize unnecessary light spill
A 10° beam may not be suitable for illuminating a large facade uniformly.
If used incorrectly, it can create:
Hot spots
Uneven illumination
Strong contrast
Best choice when: you need to highlight a specific architectural feature from a relatively long distance.
A 15° beam is slightly wider than 10° while still providing concentrated illumination.
It is often useful for vertical architectural elements and narrower building surfaces.
Building columns
Entrance structures
Narrow facades
Towers
Monument lighting
Architectural details
More coverage than a 10° beam
Still provides good light concentration
Suitable for accent lighting
Useful for medium-distance applications
For architectural projects where the goal is to highlight specific building features rather than illuminate the entire facade, 15° can be an effective option.
A 30° beam provides a balance between concentration and coverage.
For many architectural lighting applications, it can be a practical starting point when the installation distance and facade dimensions are suitable.
Hotel facade lighting
Commercial buildings
Building entrances
Medium-size facades
Architectural structures
Outdoor commercial lighting
Good balance between coverage and intensity
Suitable for many facade applications
More uniform than very narrow beams
Flexible for different building structures
For projects where you need both architectural detail and general facade illumination, a 30° beam can be worth considering.
A 45° beam distributes light over a wider area than a 30° beam.
It is suitable for general facade illumination when the fixture is installed relatively close to the building.
Commercial building facades
Hotel exteriors
Office buildings
Large walls
Architectural structures
Outdoor area lighting
Wider coverage
Good for general facade illumination
Can help reduce the number of dark areas
Suitable for medium-to-large surfaces
However, if the fixture is installed very far away from the building, a 45° beam may spread light too widely.
A 60° beam provides a wide light distribution and is suitable for illuminating relatively large surfaces.
It is particularly useful when the LED flood light is installed relatively close to the target.
Large building facades
Wide walls
Commercial areas
Landscape structures
Short-distance outdoor lighting
Large-area illumination
Broad coverage
Good for large surfaces
Suitable for short installation distances
Can provide more uniform area illumination
A 60° beam may not be ideal for long-distance lighting because the light spreads over a large area.
Best choice when: you need to illuminate a wide facade or surface from a relatively short distance.
There is no single best beam angle for every building.
A simple guideline is:
Best for:
Architectural details
Columns
Towers
Monuments
Long-distance accent lighting
Best for:
Hotel facades
Commercial buildings
Medium-distance facade lighting
Architectural details + general illumination
Best for:
General building facade lighting
Medium-to-wide walls
Commercial buildings
Best for:
Large surfaces
Short installation distances
Wide facade illumination
Use these five questions.
This is one of the most important factors.
Longer distance → consider narrower beam angles
Shorter distance → consider wider beam angles
For a narrow architectural element, a narrow beam may be appropriate.
For a large facade, a wider beam can provide broader coverage.
For high-rise buildings, the fixture may need to project light over a longer distance.
Narrow or medium beam angles can therefore be useful for certain high-level architectural elements.
Choose a narrower beam.
Consider a medium or wider beam.
If the goal is to highlight:
Columns → 10°–15°
Architectural details → 10°–25°
Medium facades → 25°–40°
Large facades → 40°–60°
These are starting points rather than fixed specifications.
Beam angle and installation distance should always be evaluated together.
For a simplified example, assuming an idealized beam pattern:
Beam diameter ≈ 2 × distance × tan(beam angle ÷ 2)
This means that as installation distance increases, the illuminated area also increases.
For example, at the same installation distance:
10° → narrow coverage
30° → medium coverage
45° → wider coverage
60° → much wider coverage
Actual lighting results will vary depending on the optical system, fixture height, lens design and photometric distribution.
Beam angle also affects facade uniformity.
A very narrow beam may produce strong illumination in the center and darker areas around it.
A wider beam can distribute light over a larger surface.
For building facade lighting, designers should consider overlapping beam patterns between fixtures.
The goal is not simply to maximize brightness.
The goal is to achieve:
Adequate illuminance + good uniformity + controlled glare + minimum light spill
Beam angle should not be evaluated separately from lumen output.
For example:
High lumens + narrow beam
→ Stronger concentration
High lumens + wide beam
→ Broader coverage
Therefore, two LED flood lights with the same wattage can produce very different lighting results if their optical systems are different.
When selecting a fixture, check:
Wattage
Lumens
Beam angle
LED efficiency
Optics
Installation distance
Mounting height
| Project Type | Suggested Starting Range |
|---|---|
| High-rise architectural details | 10°–15° |
| Monument lighting | 10°–25° |
| Hotel facade | 15°–40° |
| Commercial building | 25°–60° |
| Government building | 15°–40° |
| Bridge lighting | 10°–40° |
| Villa facade | 25°–60° |
| Large building facade | 30°–60° |
These are starting ranges, not fixed specifications. Professional lighting calculations should be used for final product selection.
Yes.
RGBW LED flood lights can use different optical distributions according to the project requirements.
For example:
10°–15° RGBW
→ Architectural details and accent lighting
30° RGBW
→ Medium facade surfaces
45° RGBW
→ General facade illumination
60° RGBW
→ Large surfaces
For dynamic facade lighting, beam angle is especially important because uneven optical distribution can affect the visual uniformity of colors.
When combined with DMX512 control, RGBW LED flood lights can create synchronized color-changing and dynamic architectural lighting effects.
Wattage does not determine light distribution.
Always check the optical specification.
A very narrow beam can create hot spots and uneven illumination.
A wide beam can spread light too widely and reduce light concentration on the target.
The same beam angle can produce very different coverage at different distances.
Incorrect aiming can create glare for pedestrians, drivers and neighboring properties.
A simple selection process:
Step 1: Measure building height.
Step 2: Measure facade width.
Step 3: Determine fixture installation distance.
Step 4: Identify the target lighting area.
Step 5: Decide whether you need accent or uniform lighting.
Step 6: Select a preliminary beam angle.
Step 7: Check lumen output and wattage.
Step 8: Review photometric data.
Step 9: Perform lighting simulation for large projects.
Step 10: Confirm the final fixture and quantity.
The best LED flood light beam angle depends on the building and lighting objective.
As a simple guide:
10° → long-distance accent lighting
15° → architectural details and narrow structures
30° → flexible facade lighting
45° → general facade illumination
60° → wide-area lighting
For most professional architectural projects, beam angle should be selected together with lumens, installation distance, building height, facade width and desired lighting effect.
The right combination can improve lighting uniformity, reduce glare and minimize unnecessary light spill.
There is no universal best beam angle. 10°–15° is suitable for narrow accent lighting, 30° is a flexible option for many facade applications, while 45°–60° is better for wider surfaces.
It depends on the facade and installation distance. A 30° beam provides more concentrated lighting, while 60° provides wider coverage. For large surfaces installed close to the building, 60° may be more suitable.
10° LED flood lights are generally used for concentrated, long-distance accent lighting such as architectural details, columns, towers and monuments.
15° LED flood lights are suitable for columns, narrow facades, vertical architectural elements and accent lighting.
30° LED flood lights provide a balance between light concentration and coverage and can be suitable for hotels, commercial buildings and medium-distance facade lighting.
45° LED flood lights provide broader coverage and can be suitable for general building facade illumination and medium-to-large walls.
60° LED flood lights are suitable for wide surfaces and applications where the fixture is installed relatively close to the target.
A narrower beam concentrates light into a smaller area, which can result in higher illuminance on the target area. However, actual performance depends on lumen output, optics and installation conditions.
Yes. RGBW LED flood lights can be designed with different beam angles, including narrow, medium and wide optical distributions.
Consider the installation distance, target area and required lighting effect. Narrow or medium beam angles can be useful for long-distance accent lighting, but professional photometric calculations are recommended.
Related Blog
https://www.always-lighting.com/Blog/how-to-choose-beam-angle-led-flood-light/
https://www.always-lighting.com/Blog/led-flood-light-lumens-vs-watts/
Related Product
https://www.always-lighting.com/led-flood-light/BuildingFacadeLEDFloodLight/